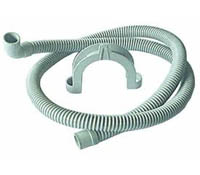
Washing Machine Drainage Pipe
Whether you're working on a new laundry room or you're replacing the washing machine drainage pipe in your current laundry room, this is a project you should be able to complete in less than an hour.
What Do You Need for this Project?
Not only can you complete this project in less than an hour, but all of the supplies required to do it will have a total cost of less than $50. The main materials you will need are a new drainage pipe, dryer vent hose and metal vent. To properly install the parts and ensure everything stays in the right place, you will also want to have cable ties, pipe strapping, adapters, PVC primer and PVC glue. Once you have all of these materials, the only tools you will need to complete this project are a
- Hose Clamp
- Screwdriver
- Reciprocating Saw
- Pencil
Attaching the Fitting and Installing the Adapter
After you gather all of the necessary materials and tools, your first step will be marking the drainage pipe so you'll know where to put the Y fitting. After marking, you can use the reciprocating saw to cut out a section on the pipe. Once you finish cutting and ensure that you've removed the burrs, you can prime the fitting, as well as the washing machine drainage pipe. You can then glue these two pieces together. This connection will create the tap-in for the fitting.
Once the fitting is properly attached, the next step you'll want to take is adding a 45 degree adapter to the drainage pipe's end. As you did with the first connection you made, you will want to prime this one before you glue it together. Once you finish gluing this connection together, you can take a one-hole strapping and attach it to the floor joist. After this is in place, you will want to slide the washing machine drainage pipe into the strapping. You'll complete this step by gluing the drainage pipe into the 45 degree adapter.
Checking the Water Lines and Installing the Dryer Vent
After you've attached the fitting and installed the adapter, the third step is to make sure the water lines are working properly. Not only is this step very easy, but it can save you from encountering a flooding problem in the future. Start this step by hooking the top of the stand pipe to the extended drain line of the washing machine. You can use a cable tie to secure the lines. You will then want to open the machine's isolation valves and check to see if there are any leaks.
If there aren't any leaks, you can move to the final step of installing the dryer vent. Before running the metal vent to the exterior hole, make sure you attach a hose clamp to its end. Once you've put the vent in position, you can use the clamp to tighten it. Complete this project by sliding in the dryer vent hose and then plugging your laundry machines back into the wall.

