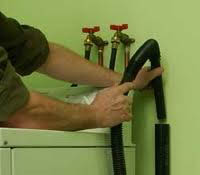
Install Washing Machine Drain
In some homes, installing a washing machine drain actually requires adding it to an existing drainpipe. This is usually found in homes where a laundry sink was used prior to a laundry machine. For this type of a washing machine drain installation, a Y joint will be used to create the necessary connection.
How to Prepare to Install a Washing Machine Drain
Before you dive into making this connection, you will want to gather all the materials and tools you'll need for this project. The main pipe you'll need is a two inch PVC. To properly connect this pipe, you'll also want a Y fitting, P-trap, primer and glue. The other two items you'll need are a plastic drain that's designed to be installed in a wall and a few 2x4 blocks of scrap wood. In addition to those materials, the tools you'll need during this project are a:
- Tape measure
- Rag
- Permanent marker
- Hacksaw or reciprocating saw
Getting Started with Your Washing Machine Drain Installation
Begin by mounting the drain adapter. Because this is an in-wall adapter, you will want to make sure that you position it between two wall studs. Since the next step in this process will require you to cut the pipe drain that's already in place, you will want to put together the P-trap. After you connect the Y fitting to its tail, you'll be able to position this below the adapter. While you're not actually going to install the component yet, this will allow you to see exactly where you're going to need to cut.
Once you can see where the cut is going to need to go, make sure you mark it. You'll then be able to use your saw to cleanly cut this pipe in the proper location. When you finish making your cut, you're going to put the Y fitting on the pipe. Like before, you're not permanently installing it yet. You're simply putting it in position so you can mark the correct measurements. After you connect the P-trap, you will want to use a piece of scrap wood to hold everything in place.
Finishing Your Measurements and Completing the Installation
Once you have everything held in place, you will be able to make any necessary adjustments to the attachment's fittings. If all the connections are in the right position, you will be able to mark them. After everything has been marked, you can take apart the temporary fittings and begin priming them. Keep in mind that you don't want to apply glue directly after putting on the primer.
When you've given everything a minute to dry, you can begin by first gluing the existing drain pipe's ends. To ensure that the glue is going to create a strong bond, make sure you hold what you're gluing in place for a minute. Continue this process as you glue the tail piece of the P-trap and the Y fitting hub. Once you've finished gluing, you can complete this project by using plastic strapping to create support for the P-trap.

